Time Machine
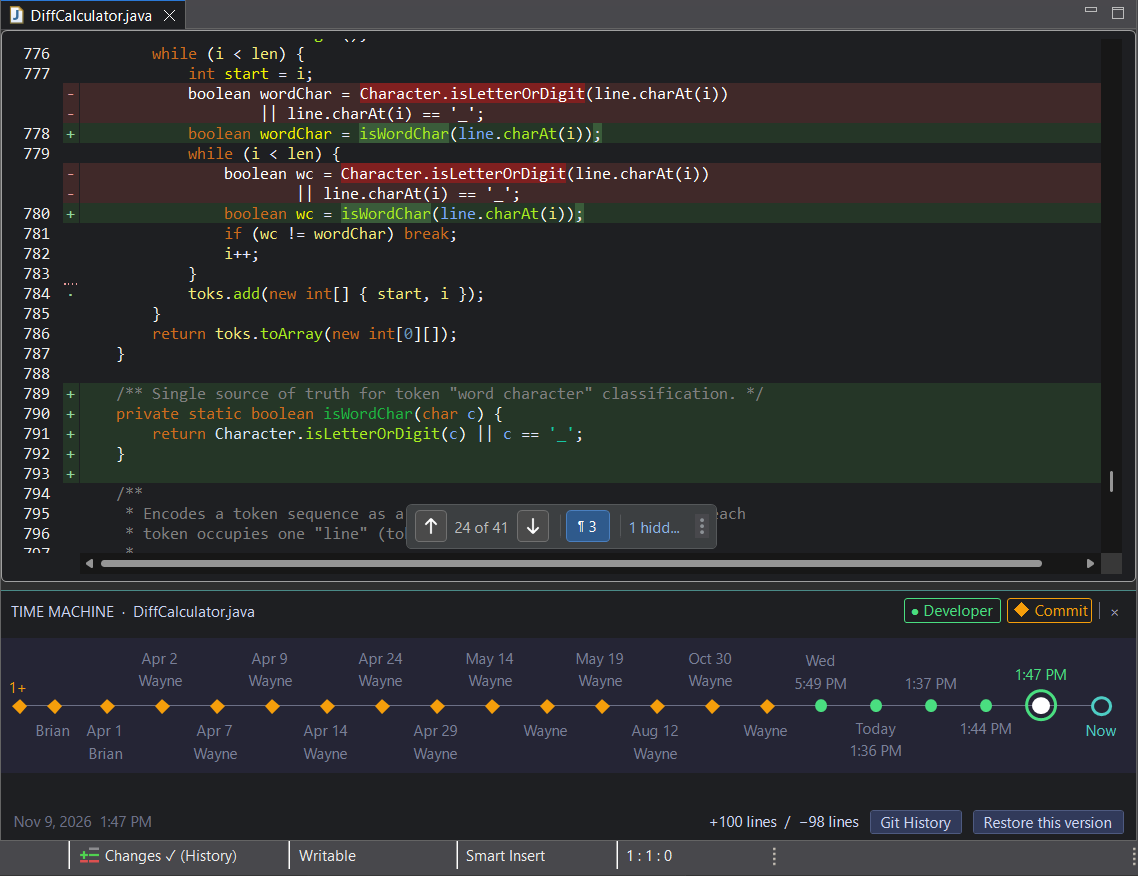
Time Machine lets you browse a file's history on a timeline and inspect past versions with changes highlighted inline.
It uses its own copy of the content. Exploring history leaves your editor buffer and the file on disk untouched, even while an AI agent is writing to the file.
How to use it
- Open the file you want to explore.
- Choose Compare with History... from the Inline Diff status bar menu or Edit > Inline Diff.
- Select a version on the timeline to inspect its content and changes.
- Use the floating navigator to step through the highlighted changes.
Added lines appear in green, and deleted lines appear as red gaps, just as in Live Review and Inline Compare. The viewer's navigator has the same ⋮ menu. The focus tools from Live Review work here too.
Configuration
Use the filter chips above the timeline to choose which versions it shows:
- ● Developer – versions you saved.
- ◆ Commit – Git commits. The review appearance follows your Eclipse editor's theme and font.
Time Machine preferences
Open General > Editors > Text Editors > Inline Diff - Live Review > Time Machine in Eclipse preferences.
Time Machine keeps its own copies of versions written by AI agents, so this history can survive Eclipse's local-history cleanup. Set Maximum agent history per file (MB) and Maximum agent history total (MB) to limit how much agent content is retained.
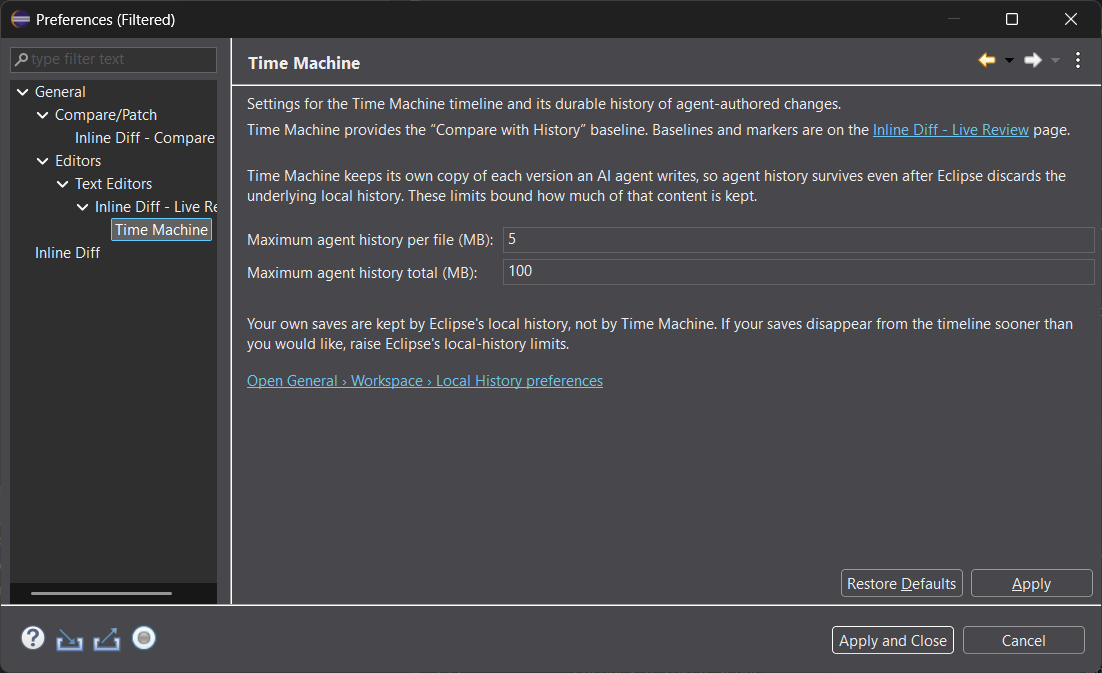
Your own saved versions are kept by Eclipse's Local History. If they disappear from the timeline sooner than expected, adjust General > Workspace > Local History. The Time Machine preference page includes a link to those settings.